Installation
Requirements
- Windows 10 or higher
- Visual Studio (recommended), VS Code, or a similar IDE capable of working with .NET code
- Microsoft Excel for reporting.
Setup
Download the installer from the link included in the welcome email then launch BacktesterSetup.exe.
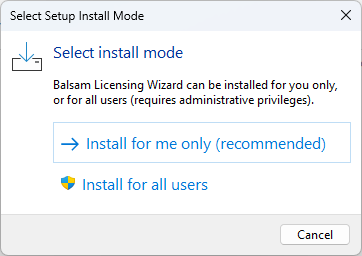
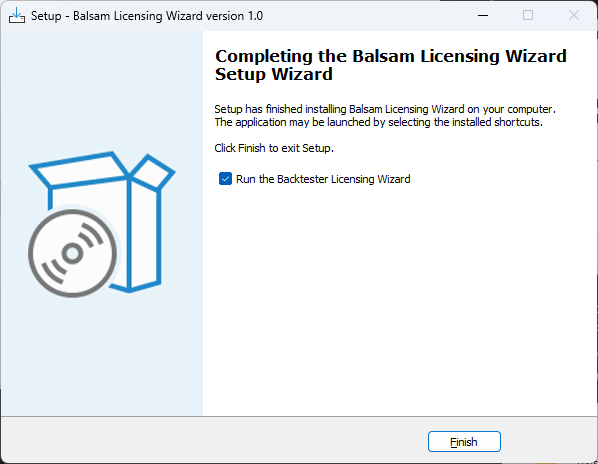
Accept the license agreement then click through the installation wizard prompts accepting the defaults. Finally, click 'Finish' to run the licensing wizard.
Paste your license key from the welcome email into the license key field. The 'Activate' button will then be enabled.
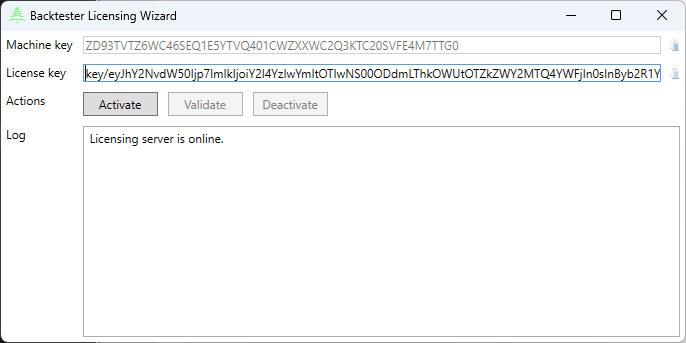
Click 'Activate' to complete the online activation process. After successful activation you can close the licensing wizard. It is no longer needed for normal operation.

Tip
If you want to transfer the backtester to another machine, the Licensing Wizard can be used to deactivate the current machine. Then repeat the installation process on the new machine. Deactivating will not delete any files other than the offline license file. Use the normal Windows Add/Remove functionality to uninstall the backtester completely if desired.
Start Menu
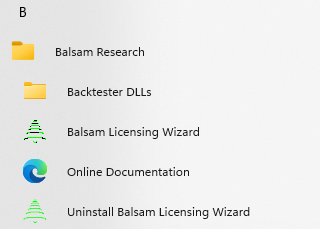
Assuming you didn't modify the defaults during the installation process, you will find a new folder "Balsam Research" in your start menu. Here you will find a shortcut to the Licensing Wizard, but more importantly, a link to the folder where the dlls are stored. You will reference these from Visual Studio, VS Code, or whatever other development environment you use for .NET projects. You can also copy this entire folder to another location on your machine if you prefer; however, you'll need to remember to copy the dll's to the new location anytime the backtester is updated.
Visual Studio setup
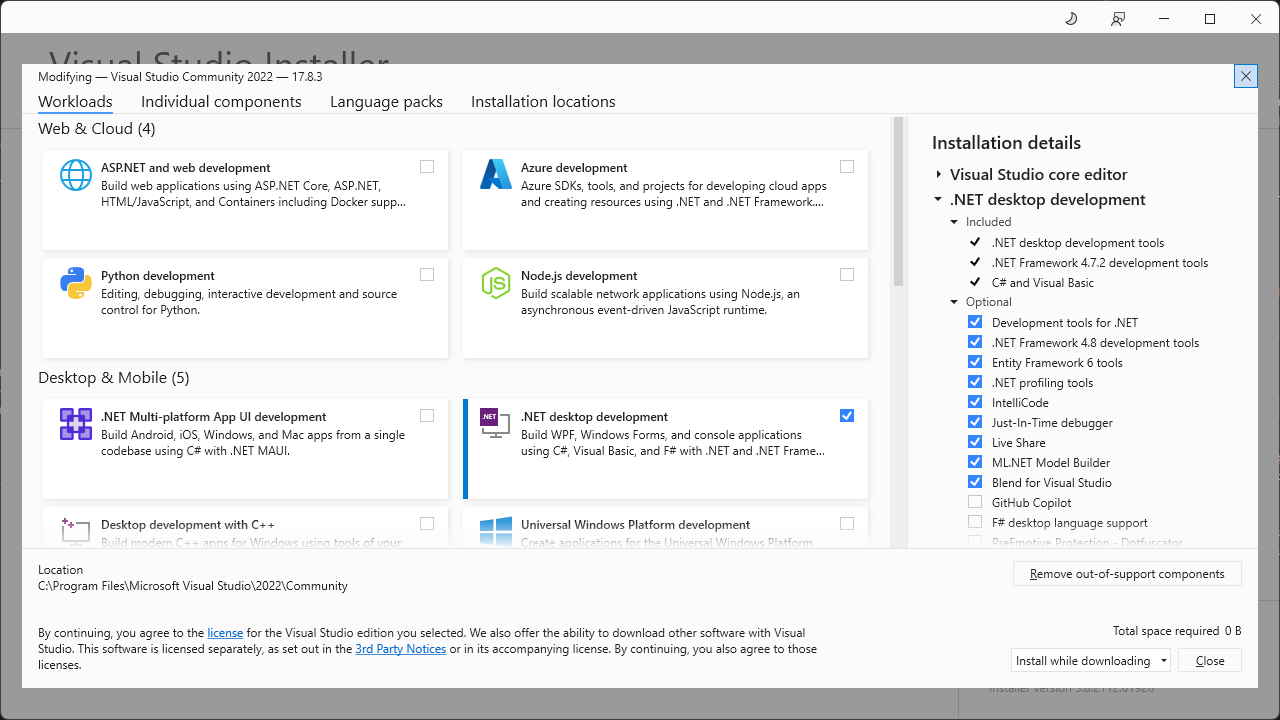
Visual Studio is the flagship integrated development environment (IDE) from Microsoft. It is an extremely capable and mature product. Even better, the Community Edition is available free for individuals and small companies. If you are installing Visual Studio for the first time, make sure to select ".NET desktop development" when prompted for workloads. This will install the .NET components needed to run the backtester, as well as C#, the language used in this documentation.
Note
The following instructions assume you are using Visual Studio 2022. The procedure should be broadly similar for other IDE's
Creating your first project
Below are instructions for creating your first project using the backtester dlls. If you are starting a new project it is recommended to target .NET Core, which is now referred to as plain .NET by Microsoft. However, you can still target the legacy .NET Framework if you prefer. For now, functionality is identical between the two but may diverge in the future. All future development will target .NET Core.
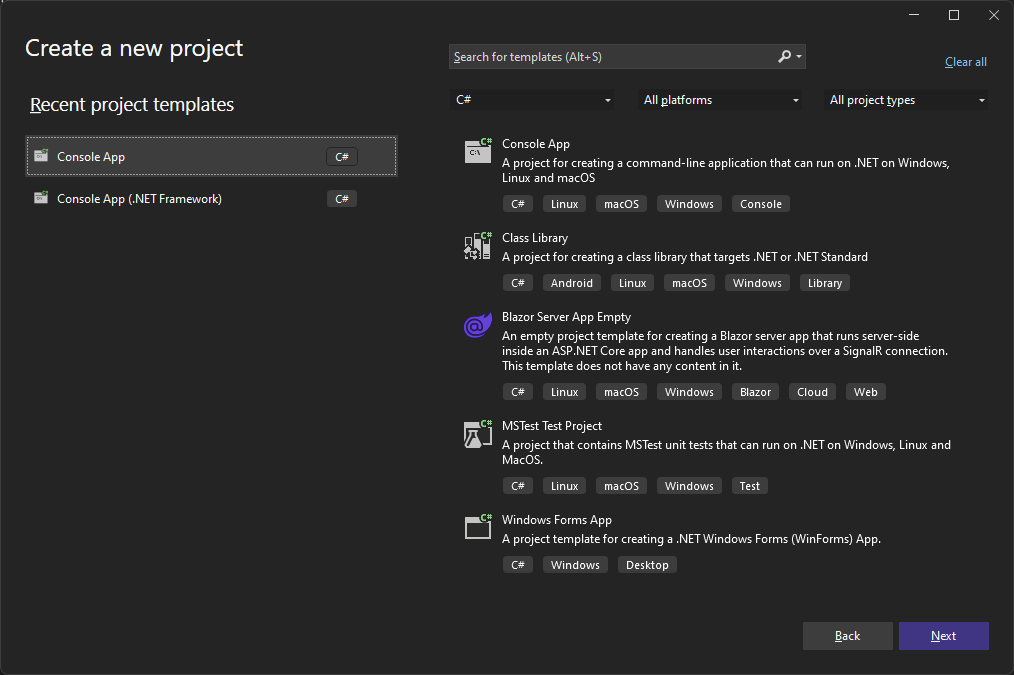
From Visual Studio, create a new project. For the project type, select Console App. If you don't see it, use the template search box at the top. Do not use 'Console App (.NET Framework)' for .NET Core projects. Once you have the correct template, click 'Next'.
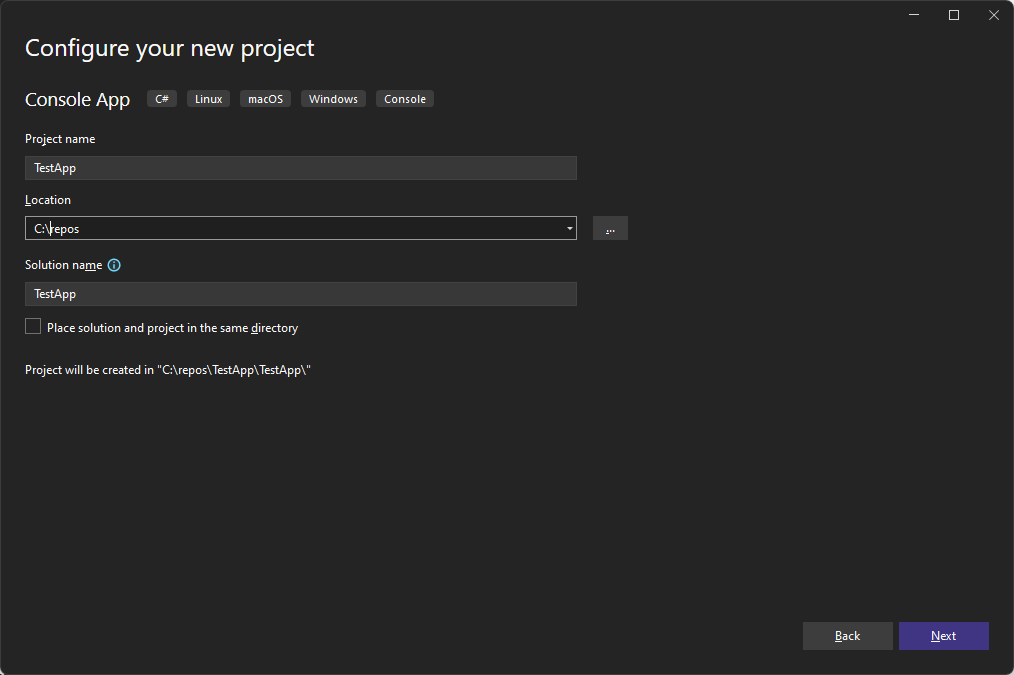
Give your project a name and click 'Next'.
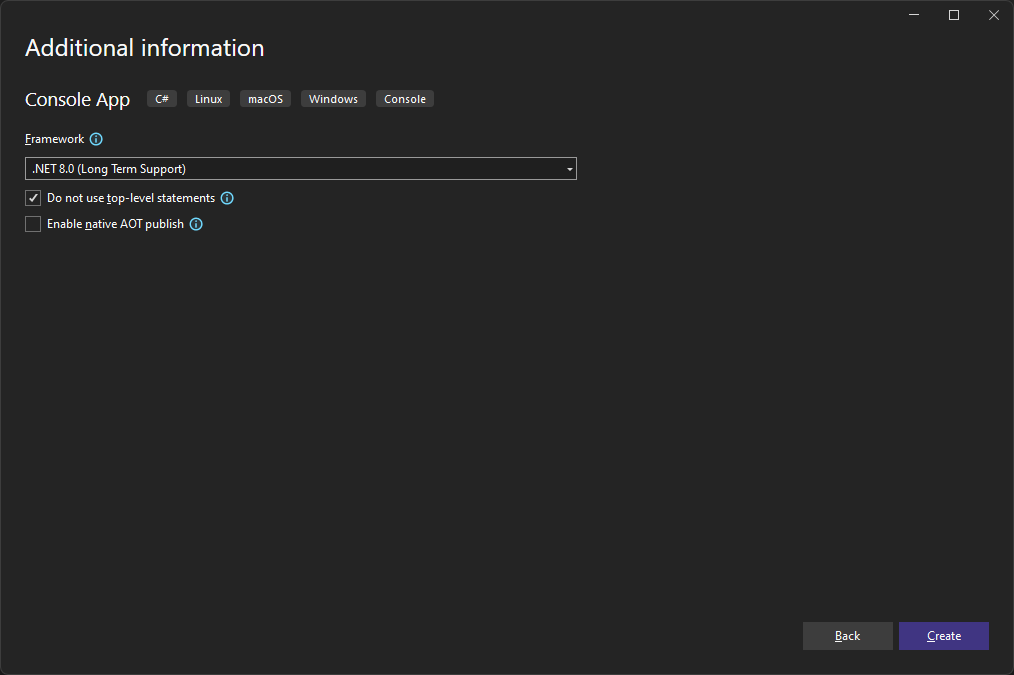
In the Framework drop down select the latest framework available. For new installations of Visual Studio this will typically be .NET 8.0. Click 'Create'.
Note
If you want to target earlier versions of .NET, you may need to have the appropriate SDK installed. To find out what SDK's are installed, enter the command 'dotnet --info' into the Terminal (in Visual Studio select View, Terminal) or a PowerShell prompt. In most cases you will see just version 8 listed in the '.NET SDKs installed:' section. In this example, version 6 is installed as well.
PS C:\> dotnet --info
.NET SDK:
Version:           8.0.200
Commit:            438cab6a9d
Workload version:  8.0.200-manifests.e575128c
Runtime Environment:
OS Name:     Windows
OS Version:  10.0.22621
OS Platform: Windows
RID:         win-x64
Base Path:   C:\Program Files\dotnet\sdk\8.0.200\

.NET workloads installed:
There are no installed workloads to display.

Host:
  Version:      8.0.2
  Architecture: x64
  Commit:       1381d5ebd2

.NET SDKs installed:
 6.0.419 [C:\Program Files\dotnet\sdk]
 8.0.200 [C:\Program Files\dotnet\sdk]
You can visit Download .NET page to acquire other SDKs if necessary. Note the SDK is distinct from the Runtime which Visual Studio already includes.
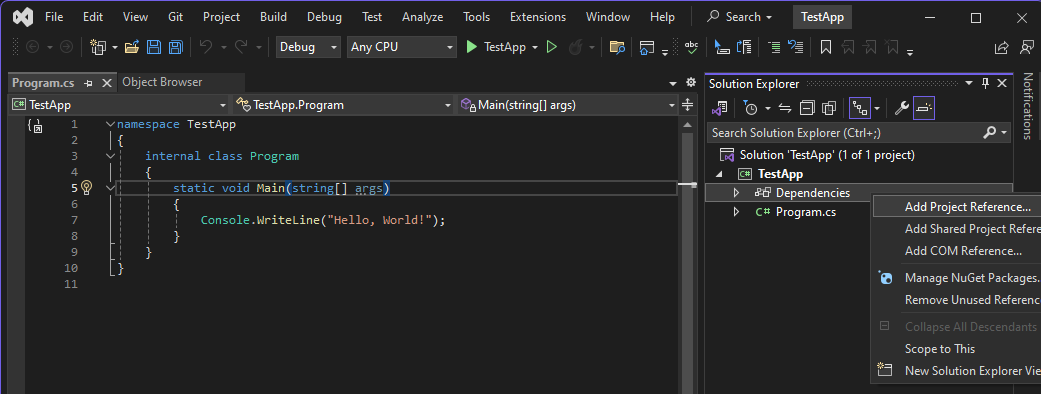
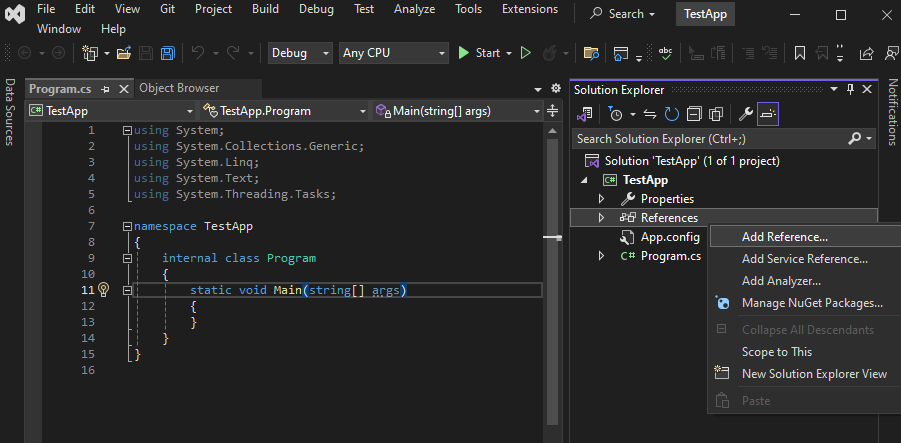
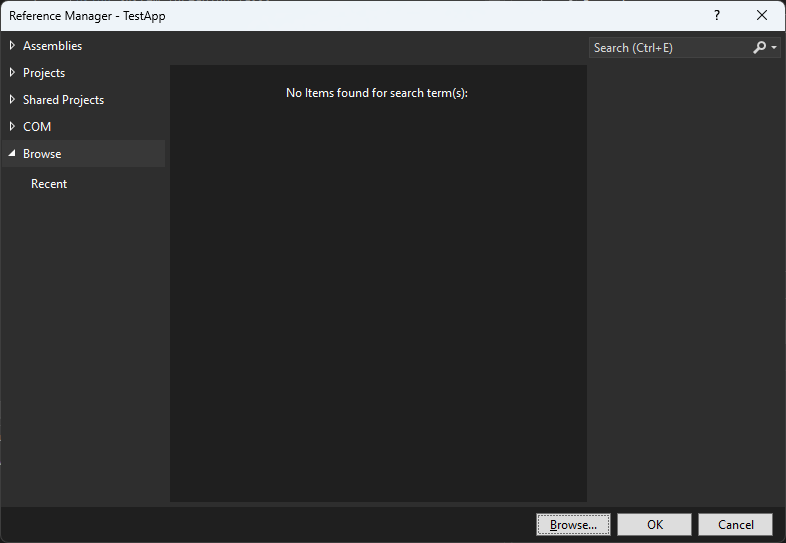
You should now see the stub of a new project. In the Solution Explorer, right click on Dependencies and select 'Add Project Reference'.
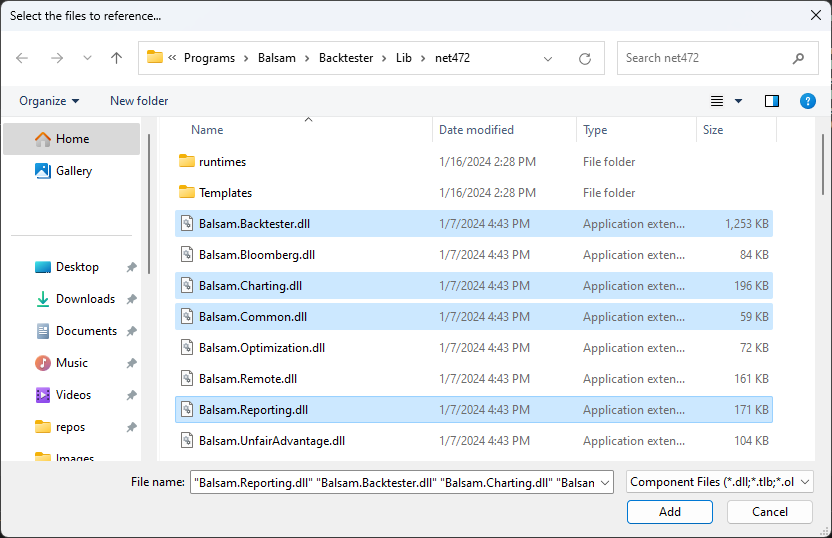
Click Browse to navigate to the folder where the Balsam dlls are contained. If you don't remember the path, go to the Start Menu, All Apps, Balsam Research, and select the Backtester dll folder. From there you can copy the path and paste it into browse file dialog. Use the dlls in the 'net6.0-windows' folder.

Holding down the Ctrl key, select the following dlls and click 'Add'.
- Balsam.Backtester
- Balsam.Charting
- Balsam.Common
- Balsam.Reporting
There are other specialized libraries available but these four contain the bulk of the functionality that most people will need.
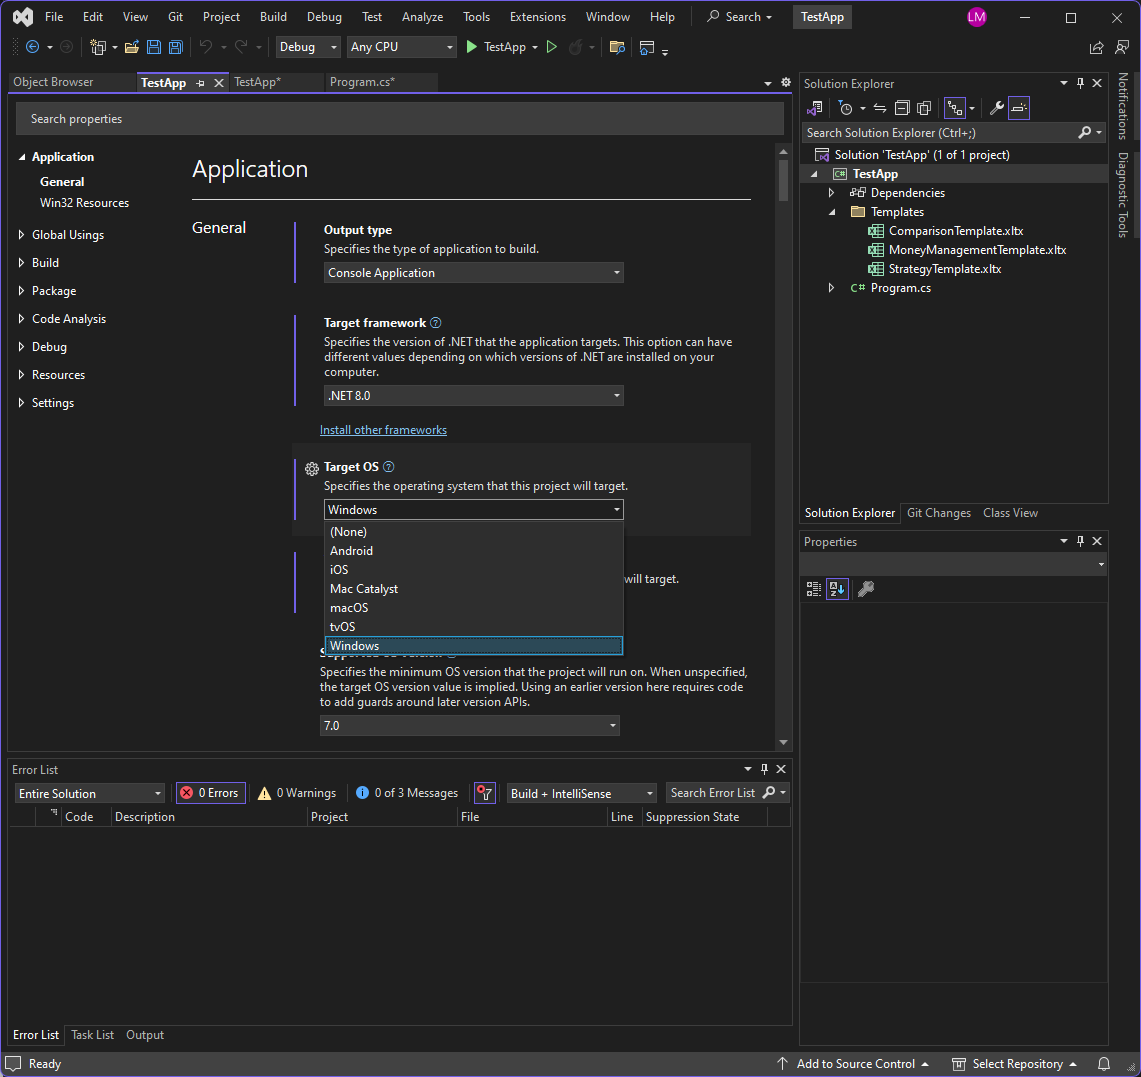
Next, right click on the project file, 'TestApp' in this example, and select 'Properties'. Under 'Target OS', change the value in the drop down box from '(None)' to 'Windows'.
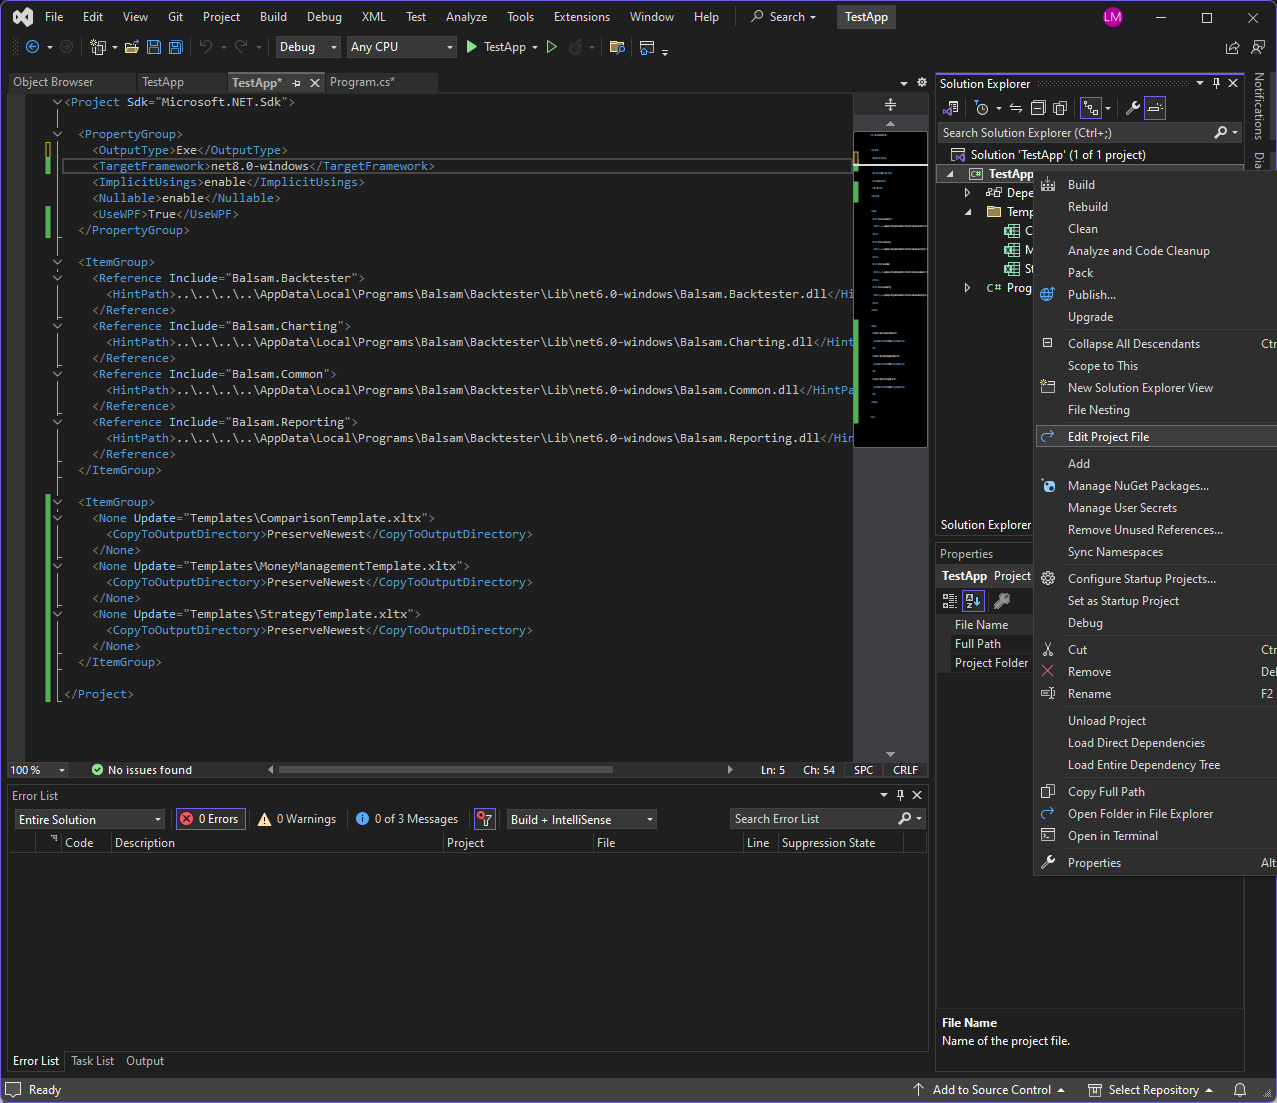
Right click again on the project and select 'Edit Project File'. In the top xml section <PropertyGroup> add a line at the bottom <UseWPF>True</UseWPF>. This instructs Visual Studio to include the necessary assemblies for displaying charts. Your project file should look very similar to this:

Templates folder
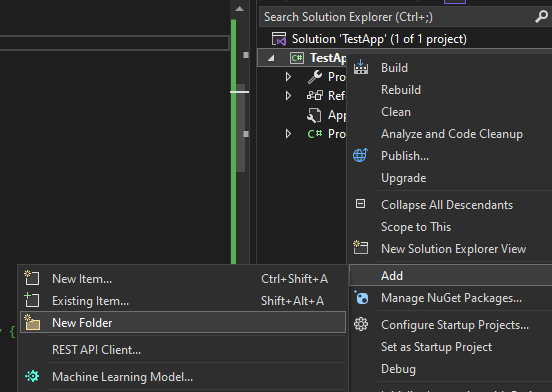
By default, the backtester exports simulation results to Excel using Excel templates. The backtester includes a few standard templates that can be used as-is or as a starting point for further customization. Your code needs to know where to find these templates. So let's create a new folder in the Visual Studio project to store these templates for easy access. Right click on the project, select 'Add' and then 'New Folder'. Name this new folder "Templates".
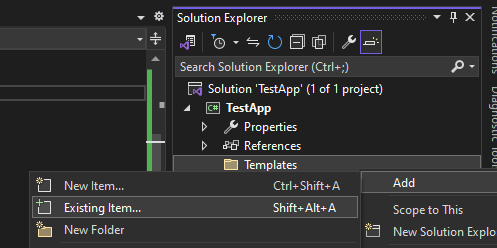
Next, right click on the Templates folder, select 'Add', and then 'Existing item'.
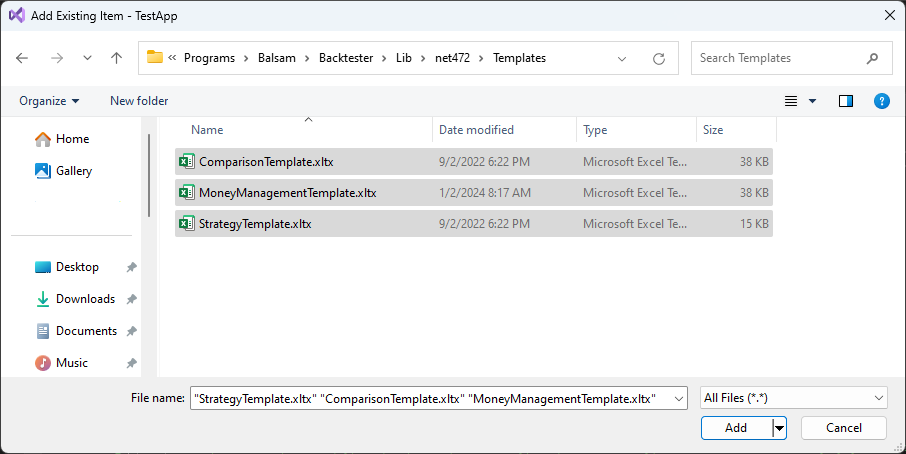
Navigate to the Backtester dll folder (use the Start Menu shortcut if needed to find the path). Navigate to the Templates folder, make sure the file mask in the lower right is set to 'All Files (*.*)', select the three existing templates and then click 'Add'.
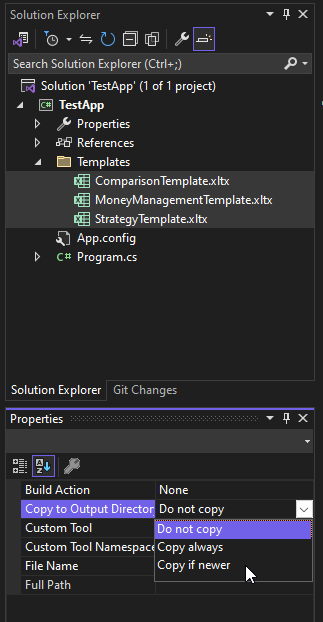
Copies of these templates will now be contained in your Templates folder. Select the three templates and from the Properties Window and change the 'Copy to Output Directory' property from 'Do not copy' to 'Copy if newer'. If the Properties Window isn't visible, select View, Properties Window from Visual Studio.
This one-time setup procedure ensures the backtester can easily find the templates without additional work. You are now ready to start running backtests with Visual Studio. But first, we need to cover a few basic concepts.